Overview
Sublime Text is a multi-platform text editor developed by Jon Skinner in 2008. Interestingly, it’s one of the most widely used and loved code editors within the programming community.
In this guide, we’ll discuss Sublime Text, highlight its key features, and demonstrate how to install Sublime Text on Ubuntu using different methods
What is Sublime Text
Sublime Text is a lightweight, fast, and user-friendly code editor written in C++ and Python, supporting all major programming and markup languages. It also provides a wide range of free plugins and powerful customization options. Consequently, it has become an crucial tool for developers to improve their programming efficiency.
Features of Sublime Text
Now that we’re familiar with Sublime Text, let’s explore some of its key features:
- Smart Code Completion: Predicts and auto-completes your code
- Code Snippets: Quickly insert pre-defined code snippets
- Multi-Selection Editing: Edit multiple lines or words at once
- Quick File Access: Navigate between files and symbols with ease
- Extensive Plugin Support: Extend functionality through community-created plugins
Methods to Install Sublime Text in Ubuntu
Now, let’s explore how to install Sublime Text in our Ubuntu system. In this section, we’ll cover two installation methods: one for GUI lovers and one for those who prefer working with terminal commands.
1. Through Ubuntu Software (GUI)
In the first method, we’ll install sublime text through the Ubuntu Software Center, which may be the preferred option for new Ubuntu users due to its graphical interface. First, boot up your Ubuntu system and search for software in the search bar or open it from the Applications menu:

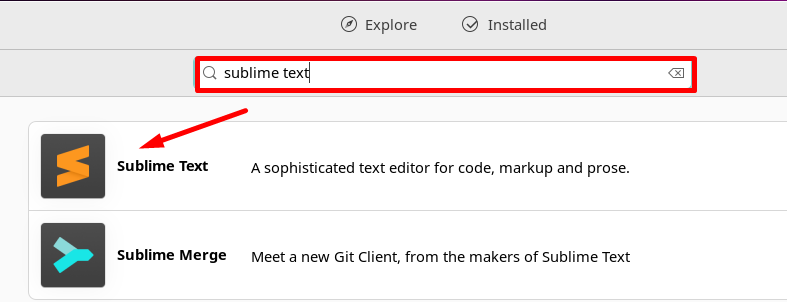
After opening the Software Center, search for Sublime Text in the search bar and click on the Sublime Text icon:
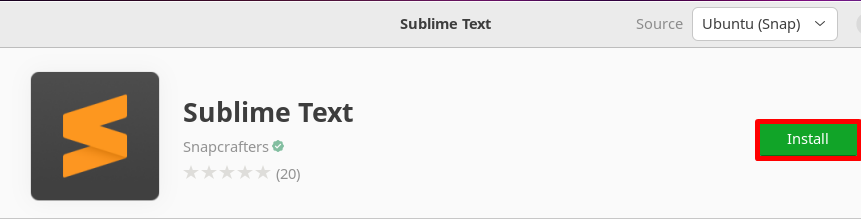
Now, click on the Install button to install the Sublime Text in your system:
Consequently, a dialog box will appear which will ask for your user password. Here, enter your password and authenticate by clicking on the “Authenticate” button. After the installation, you can check if Sublime Text is installed by opening it from the Applications menu or by searching for it in the search bar:

Finally, you’ve successfully installed Sublime Text on your Ubuntu system. You can now enjoy using it!
2. Through Snap command (CLI)
In the second method, we’ll install sublime text using the snap command. Let’s go through the steps involved in this process.
First, install Snapd on your system if it’s not already installed by executing the following command:
$ sudo apt install snapd
After ensuring that Snapd is installed, let’s install Sublime Text by executing the following command:
$ sudo snap install sublime-text -classicIt may take a minute or two to install:

Finally, you can confirm the installation or check the version of Sublime installed on your system by running the following command:
$ subl -versionThe output shows that my version is Build 4180:

Therefore, it confirms that Sublime Text is installed and ready to use!
Uninstall Sublime Text from Ubuntu
Now, if you want to uninstall Sublime Text from your system, you can follow any of the methods below, depending on your installation method.
1. Through Ubuntu Software (GUI)
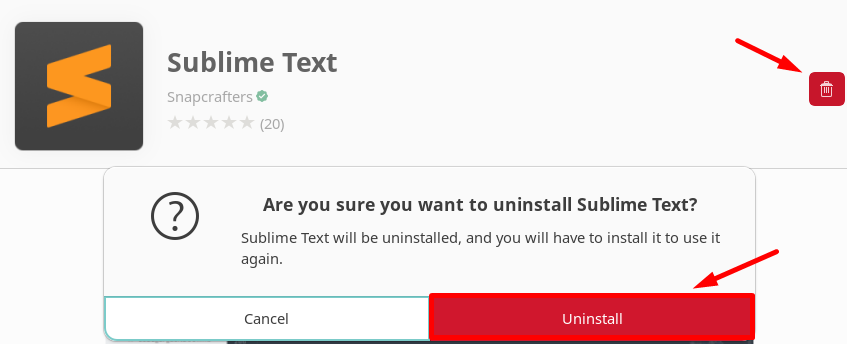
You can easily do so by clicking on the Trash icon in the Ubuntu software center. A confirmation message will appear, here click on the Uninstall button to proceed:
2. Through Snap command (CLI)
You can remove Sublime Text from your Ubuntu by executing the following snap command:
$ sudo snap remove sublime-textFinally, you’ve learned how to install and uninstall Sublime Text from Ubuntu.
Conclusion
All in all, Sublime Text is a liked code editor, famous for its efficiency and plenty of plugins. In this tutorial, we discussed its usage, features, and methods to install it on Ubuntu. We hope this article was helpful and achieved its expected purpose.
I’m Malaikah, a Digital Forensics and Cyber Security student and CEH certified, with a passion for writing about Linux and the tech world.